XWiki is a growing open source wiki that can be easily used withing a corporate. It has many features that can be integrated in a wiki application with reliability for the user. XWiki is written in Java and supports a variety of datasources: MySQL, PostgreSQL, Oracle etc.
1. Install the requirements: xeclipse, xwiki
– Download and install the visual platform needed for xwiki projects: xeclipse
– Download and install the stable xwiki version from here: xwiki
2. Configuration:
The first step is to activate the user/password default of xwiki. For this go to
xwiki.cfg
from xwiki sources (XWiki Enterprise\webapps\xwiki\WEB-INF), go to line where they are declared in the file (“Authentication and authorization”) and uncomment this line:
xwiki.superadminpassword=system
A line is being commented when placing “#” in front of the line. To uncomment the line, simply delete this symbol (using syntax XWiki Syntax 2.0 ).
To verify that you installed the xwiki correctly on your computer, start the xwiki(start_xwiki.bat), and type this in the browser’s address bar:
http://localhost:8080/xwiki/bin/view/Main/
3.Notions of XWIKI:
– Space: a space is a new project(folder) that can be created from Xeclipse right clicking(Choose->NewPage) or using the visual wizard of xwiki from browser. By default the wizard is on the right side of the browser’s page. From there you can create a space and a page in the selected space.
– Page: a page is included in a space.
– Macros: there are 2 types of macros(XWiki Syntax 2.0 ) velocity macros , and xwikiMacros. The latter can be written in Java(Java Macros).
If you want to :
– Change the port xwiki is running on: open the ‘start wiki.bat’ file with an editor(ex Notepad) and change the line regarding to the port:
set JETTY_PORT=8080
– Change the Database is using: go to
hibernate.cfg
file from xwiki sources (XWiki Enterprise\webapps\xwiki\WEB-INF), open it with an editor and uncomment the specification of the needed type of database, using your credentials in the description details.
4. Create a form with field validation:
To create a form in xwiki you need to
- Create a new space: ex. UserForm.
- Create a new page in the space with suffix ‘Class’: ex. UserFormClass
– In this class you set the name of the project(space) and the name of the default parent page name and include (if chosen) the Xwiki.ClassSheet page that has the visual wizard of creating a new page in the working space.
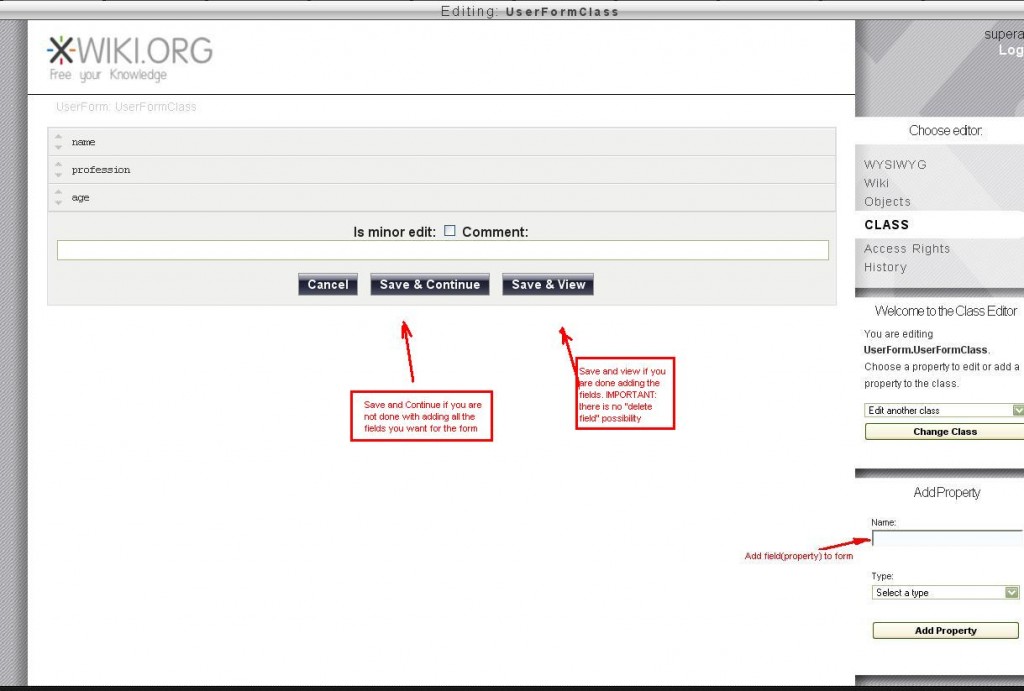
– Add the fields(properties) that you need for the form. In the browser, go to the Class page. Ex: http://localhost:8080/xwiki/bin/view/UserForm/UserFormClass.
– Once there, choose from the top menu: Edit->Class. From the right side menu, choose the “Add Property” panel wizard to add a field(property) in your form: ex. Text, type: Textarea.
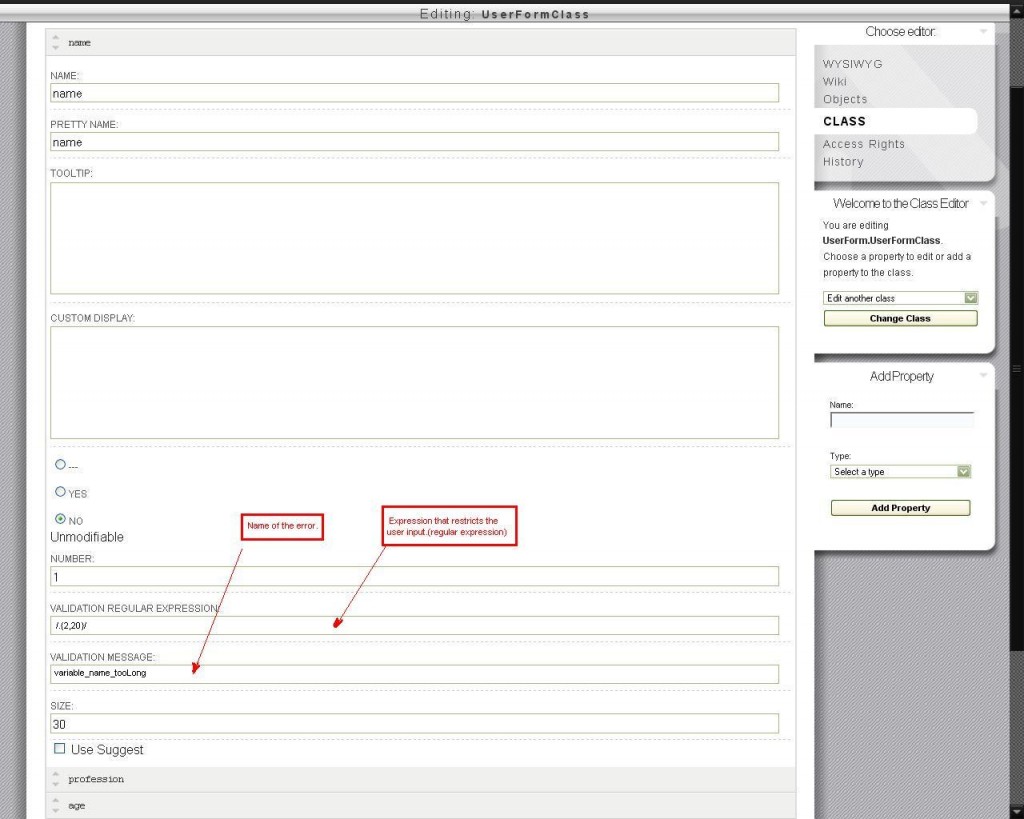
– This class has the definition of fields and translations of the error messages according to the regular expressions.
Ex: for a field “name”, on the Validation Regular Expression: “/.{2,20}/”
– Validation Message: “variable_name_toolong”. The validation message will be declared in the translations page and the regular expression will be used in a Java validation class.
- A formular in xwiki has to have these pages in the space: ClassSheet and ClassTemplate.
– ClassSheet: “Sheet presenting the document in create, edit and view mode including validation error messages”
– in which you verify the display mode of the page: view or edit. You implement the macros to display the fields, to display the user input errors. Launch the validation on the document
– ClassTemplate: template of the document, it includes the ClassSheet page:
#includeForm(“UserForm.UserFormClassSheet”)
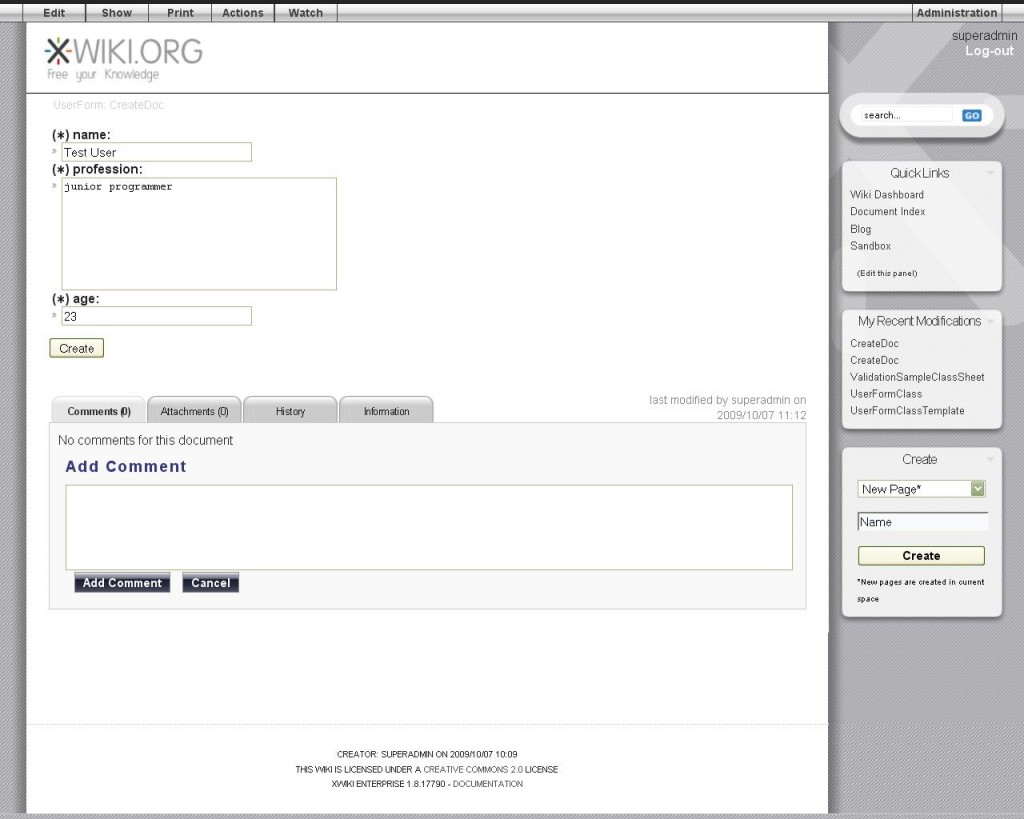
- Create a page that will process the form. Ex: CreateDocument
– On submit it gets the users inserted data from request and creates a new object with them. The data is validated. If it passes the validation with success, you can see the final details of the form. If not, you are not allowed to pass this step and error messages will appear on the error fields.(Figure 3)
– The validation is launched by setting the a validation script using a Velocity function:
setValidationScript(java.lang.String validationScript)
– Every successful creation of a document creates a new page in the space with the users’ details with an unique page name.
- Create a page to point to the form fields, (ex: UserFormFields) that has this code:
#includeForm(“UserForm.UserFormClassSheet”)
- Create the validation page(Java Class) using groovy script:
– ex: ValidationGroovy
– You verify the form fields and see if they match to your rules
- Create a WebHome page that shows the form to the user
– It calls the ClassTemplate for showing the form
- Create a page for Error Translations: ex. UserFormTranslations
– In this page add the name of the errors(name set before when adding the form fields) and set the User Friendly description for it. Ex:
var_age_incorrect = The age you inserted is incorrect. Please write an accurate age. Thank you.
– So, to test the creation of a form access the WebHome of the space:
- http://localhost:8080/xwiki/bin/view/UserForm/WebHome
5. Resources for the tutorial:
http://platform.xwiki.org/xwiki/bin/view/DevGuide/Creating+a+form+with+validation+and+tooltip
http://platform.xwiki.org/xwiki/bin/view/Main/XWikiSyntax
Finally, there’s another very important peculiarity of what does Cialis that brings it so high above its alternatives. It is the only med that is available in two versions – one intended for use on as-needed basis and one intended for daily use. As you might know, Viagra and Levitra only come in the latter of these two forms and should be consumed shortly before expected sexual activity to ensure best effect. Daily Cialis, in its turn, contains low doses of Tadalafil, which allows to build its concentration up in your system gradually over time and maintain it on acceptable levels, which, consequently, makes it possible for you to enjoy sex at any moment without having to time it.
[…] This post was mentioned on Twitter by Vincent Massol and Sebastien Sauteur. Sebastien Sauteur said: RT @ldubost: RT @glaforge: RT @vmassol:Nice article about creating form w/ validation in XWiki http://tinyurl.com/ydqk7dw […]
October 8, 2009 at 10:32 pm