By now, every Android developer has heard of product flavors. We all know they allow us to add small customization to our application, for example, we could change the app icon or the app colors. This sounds great, imagine all the things you could do ! But what if you’ve never had the chance to use product flavors before ? Don’t worry, we got you covered, the following tutorial provides an introduction to product flavors and what you can do with them.
So, what exactly can you change with product flavors ? Well, for starters, there are a few properties you can change in the build file (full list on Android Tools Project Site) :
- minSdkVersion
- versionCode
- versionName
packageNameapplicationId (using gradle plugin 0.11+)- signing configurations
Besides these properties, a product flavor can have it’s own source code, resources and manifest. All product flavors extend the main configuration. Because we can add code specific to a flavor, we need to follow some rules to make sure everything builds :
- a class that is specific to a product flavor can’t appear in the main configuration
- classes exposed by product flavors and referenced by classes in the main configuration must be present in all product flavors and must have the same API
- classes in the main configuration can reference classes in product flavors and vice versa
These rules basically tell us that, a customized component, that is referenced from a common component, must be placed in the source folders of the product flavors and not in the main source folder. The customized component must also provide the same API across all flavors.
This may be a little confusing but, hang in there, it will all clear out if you keep reading.
Setting up product flavors
Starting from a new Android Project, adding product flavors is pretty straightforward :
 productFlavors {
        great {
            applicationId "ro.stemo.productflavorstutorial.app.great"
            versionCode 2
            versionName "1.1"
        }

        awesome {
            applicationId "ro.stemo.productflavorstutorial.app.awesome"
            versionCode 3
            versionName "2.0"
        }
} |
Adding the above code in the build.gradle file, in the android block, will result in creating two product flavors named great and awesome. A product flavor is characterized by it’s name,which is mandatory, and the overridden properties specified (not mandatory). For our two flavors we decided to have different package names, this is not mandatory for flavors, so we can install both apps on the same device. We also changed the versions, because we don’t want the packageName property to feel lonely. Also, this code snippet will add new gradle tasks and the Build Variants view will help us to switch between flavors (only one flavor can be active at a time).
We now have two flavors of our app, we can install both of them in the same device because they have different package names but, other than the version, there is nothing different between these flavors. Let’s make some changes !
App icons
One of the first things we want to change is the app icon so we can distinguish the flavors. Remember the first rule ? the one about custom classes being placed in flavor source folders instead of the main source folder ? well, it applies to resources too !
We start by adding source folders for our flavors (Android Studio 0.5.4 does not create them automatically). In the src folder of the application, create a folder for each of the product flavors and name it after the flavor. In our case we need two folders : awesome and great, these will be the root source folders for our flavors and they must abide by the general folder structure imposed by Android Studio.
Back to our icons, we want different icons for our flavors so that means that the icons must be placed in the flavor folders as you can see in the image bellow
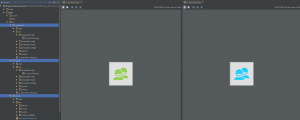
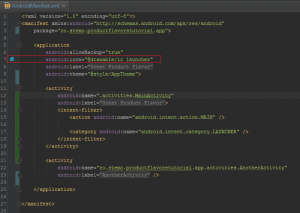
The AndroidManifest is placed in the main source folder and the app icon declaration has nothing out of the ordinary (as you can see in the image bellow). The Gradle build system will use the resources provided for the active flavor type.
String resources
The next visible thing after the icon is the application’s name. Product flavors allow us to use custom resources (strings, dimensions, colors, etc.). The same rule applies to resources, a custom resource must reside in the flavor source folders. Unlike classes or images, resources can be mixed up in the way that the main configuration could contain common resources and flavor source folders need to contain only the customized resources. For example, we can have a string.xml file in the main source folder that will contain text displayed by the application and the flavor source folders will have a strings.xml file that will define only the resource that corresponds to the application name, see image bellow.
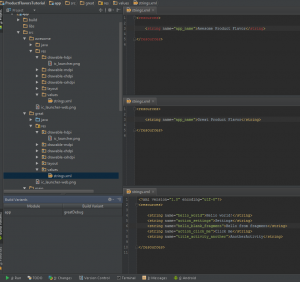
You can notice that the top files define a single resource, the app name, while the bottom one defines more resources. You can notice that the first file has some errors in it, that’s because resource files and classes from flavors other than the active one, are not recognized as source files.
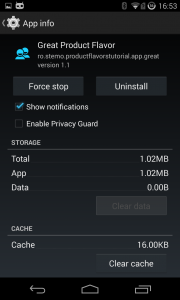
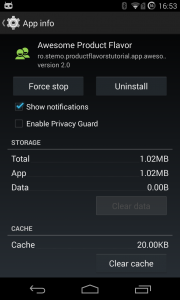
Now that we changed the launcher icons and the application names we can distinguish the two product flavors :
Stay tuned for part 2 of the tutorial where I will show you how to write custom code for product flavors, use custom layouts and more.
You can find the sample project here!
Finally, there’s another very important peculiarity of what does Cialis that brings it so high above its alternatives. It is the only med that is available in two versions – one intended for use on as-needed basis and one intended for daily use. As you might know, Viagra and Levitra only come in the latter of these two forms and should be consumed shortly before expected sexual activity to ensure best effect. Daily Cialis, in its turn, contains low doses of Tadalafil, which allows to build its concentration up in your system gradually over time and maintain it on acceptable levels, which, consequently, makes it possible for you to enjoy sex at any moment without having to time it.

