As you may know, Liferay 6.2 is using Bootstrap 2 together with an UI framework called AlloyUI. I believe we can all agree that this combination doesn’t really help with reaching the desired results anymore. Most of you feel the need for something more, something you are more familiar with, something like Bootstrap 3 (for example).
Now, you are probably wondering why Liferay 6.2 is using this old version of Bootstrap. The official post regarding this particular “issue” states that Bootstrap 3 launched a bit over a month before they were planning to launch Liferay 6.2. And they did not feel confident that it could be successfully integrated in that short period of time. That’s pretty much it.
Anyway, history lessons aside, it is time to get down to business. As you probably guessed already, in this tutorial I will tell you how to make Bootstrap 3 work with a Liferay Theme.
Before you start implementing what I’m about to show you, please remember that with all stuff regarding Liferay there is no such thing as best solution when you want to overwrite or change any of it’s mechanics. Liferay is build in a “mysterious” way and there’s nothing you can do about it. Best case scenario you will get a good solution, such as this one.
First of all you have to create a Liferay Theme (using either Ant or Maven).
- Go to the official bootstrap page (http://getbootstrap.com/) and download the latest version. Once this is done, go ahead and copy the bootstrap.css file into your liferay theme (in the css folder). Rename the file to bootstrap-custom.css .
- Make sure you also have the custom.css file, since here is where you’ll add all your custom css code.
- Open custom.css. At beginning of the code you have to write an @import tag for the newly added bootstrap-custom.css .
![]()
- Now I am going to explain a few things to you, so you can better understand why you’re about to do what I’m about to tell you to (english… funny language, huh?).
Because of the AlloyUI framework used by Liferay, all css classes must have the class .aui before them. This is basically one of the main reasons why simply dropping bootstrap 3 into your theme will not work. This and it also won’t overwrite properly the current bootstrap classes, resulting in even more bugs.
- Open the bootstrap-custom.css file. Where the css code begins, add: .aui {

- Next, go to the end of the file and close the bracket. Now everything has that nasty .aui class in front of it. Lucky for us, Liferay already knows what SASS is, therefore nesting the css is ok. But we’re not finished yet. There are still a few annoying little bugs…
- Next, do a search for .modal . I believe it will take you to the class .modal-open . I want you to comment all the modal classes.
Liferay uses the modal a lot, especially for the admin tools. From what I noticed, it doesn’t use just css classes, it also generates automatically css code in a style attribute on the tags as you activate certain modals in the Portal (crazy, right?). There is no way you can successfully overwrite and/or replace all that logic (unless you want to ruin everything and waste your time), therefore it is best to simply stick with the modal version from bootstrap 2 and use everything else from bootstrap 3. It’s safer this way.
We are done with the custom bootstrap 3 file. You won’t return to it, so you can say your farewells.
- If you refresh your Liferay Portal page (and if you are logged with an admin account), you will notice that the navbars (dockbar) are gone.
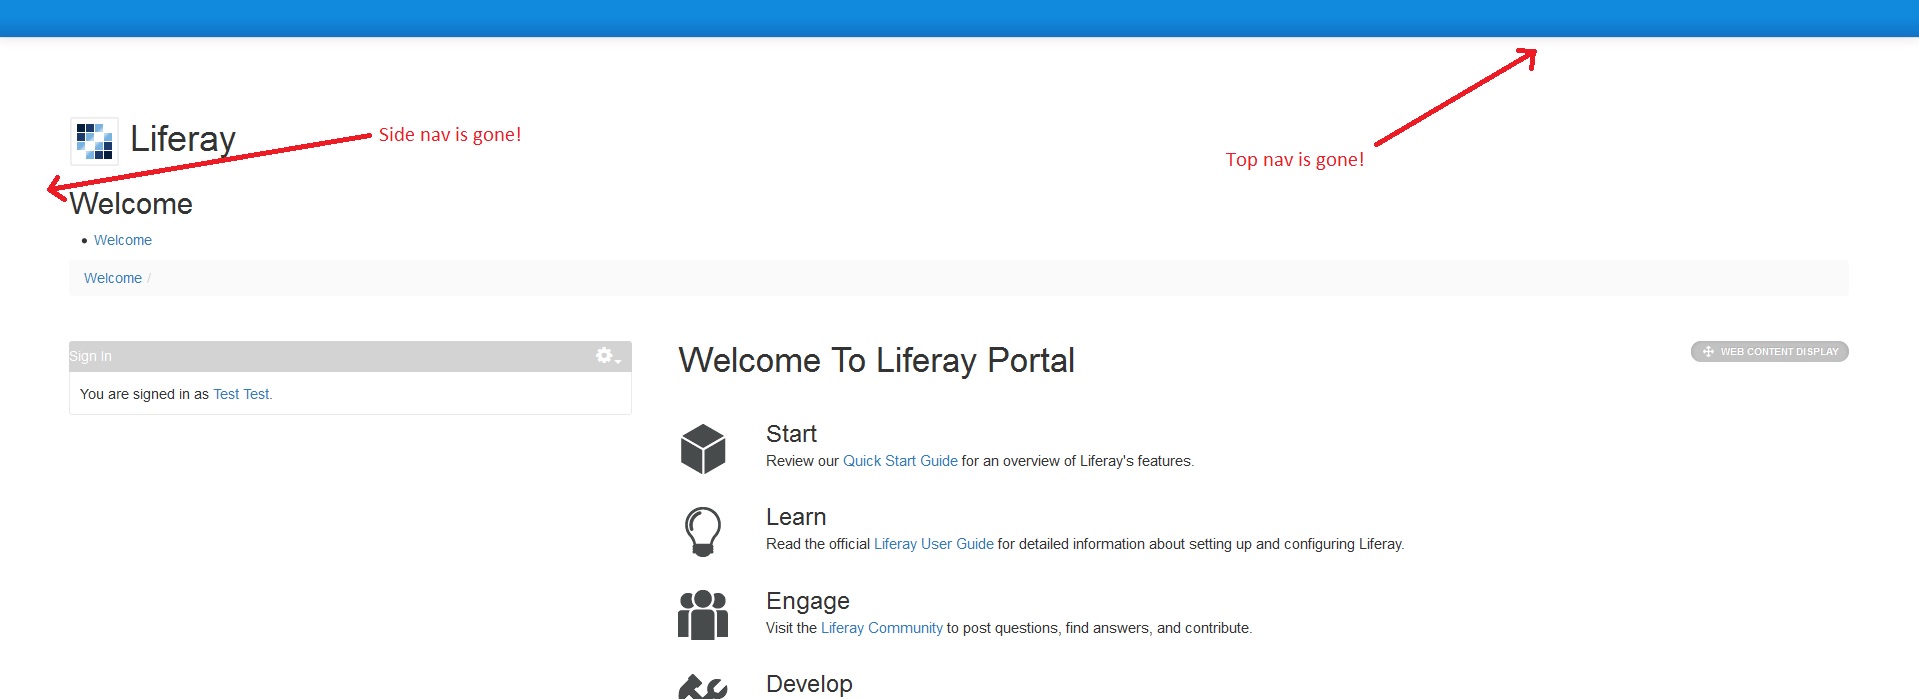
- Also some of the design is a bit ruined (because of the new css changes), but this can be easily fixed. Just use the Inspect Element tool like a pro and “have fun”.
- To fix the dockbar bug, you can use the following skeleton structure on which you can continue building your custom theme (unless you wish to do more research on the matter and come up with a better solution).
- The following code will go in the file custom.css after the already written Liferay code. I will include the full default class hierarchy for the dockbar (or as close as I can), so you can understand the structure and also have a better chance at customizing it.
.aui {
  .portlet-static-end {
    .navbar-static-top {
      .navbar-inner {
        position: relative;
        background-image: none !important;

        .container {
          position: relative;

          div {
            display: inline;

            /*** TOP NAVIGATION (Admin, My Sites, Notifications, User) ***/
            .nav-account-controls {
              position: relative;

              /* Annoying dividers in nav */
              .divider-vertical {
                display: none;
              }

              /* Navbar Items - containers */
              .admin-links,
              .my-sites,
              .user-avatar,
              .sign-in {
                background-image: none !important;

                /* Navbar Items - links */
                a {
                  background-image: none !important;
                  color: #fff;

                  /* Navbar Items - caret icons */
                  .icon-caret-down {}
                }

                /* Navbar Items - links - hover effect */
                a:hover {}

                /* Navbar Dropdown - list body */
                .dropdown-menu {
                  /* Navbar Dropdown - list elements */
                  li {
                    a {}
                  }
                }
              }

              /* Notifications - this one needs special attention */
              .dockbar-user-notifications {
                background-image: none !important;

                /* button body */
                .user-notification-link {
                  position: relative !important;

                  /* notifications/requests count */
                  span {}
                }

                /* Notifications panel */
                .dockbar-user-notifications-container {

                  /* dropdown body */
                  .dropdown-menu {

                    /* items bodies (notifications & requests) */
                    .non-actionable,
                    .actionable {
                      display: block;
                    }

                    .non-actionable,
                    .actionable {

                      .user-notifications-header,
                      .user-notifications {
                        display: block;
                        position: relative;
                      }

                      /* header */
                      .user-notifications-header {
                        span {
                          a {
                            /* notification/requests counter */
                            .count {}
                          }
                        }
                      }

                      /* body */
                      .user-notifications {}
                    }
                  }
                }
              }
            }

            /*= Navbar Account controls - Sign In =*/
            .sign-in {
              a {
                span {}
              }

              a:hover {
                span {}
              }
            }

            /*** SIDE NAVIGATION (Add, Preview, Edit, Edit controls) ***/
            /* menu container */
            .nav-add-controls {
              li {
                background-image: none !important;

                /* menu items */
                a {
                  /* Icons */
                  i {color: #fff;}

                  /* Text */
                  span {color: #fff;}
                }
              }
            }
          }
        }
      }
    }
  }
}
- After adding the code above, refresh the portal page. It should look like this:
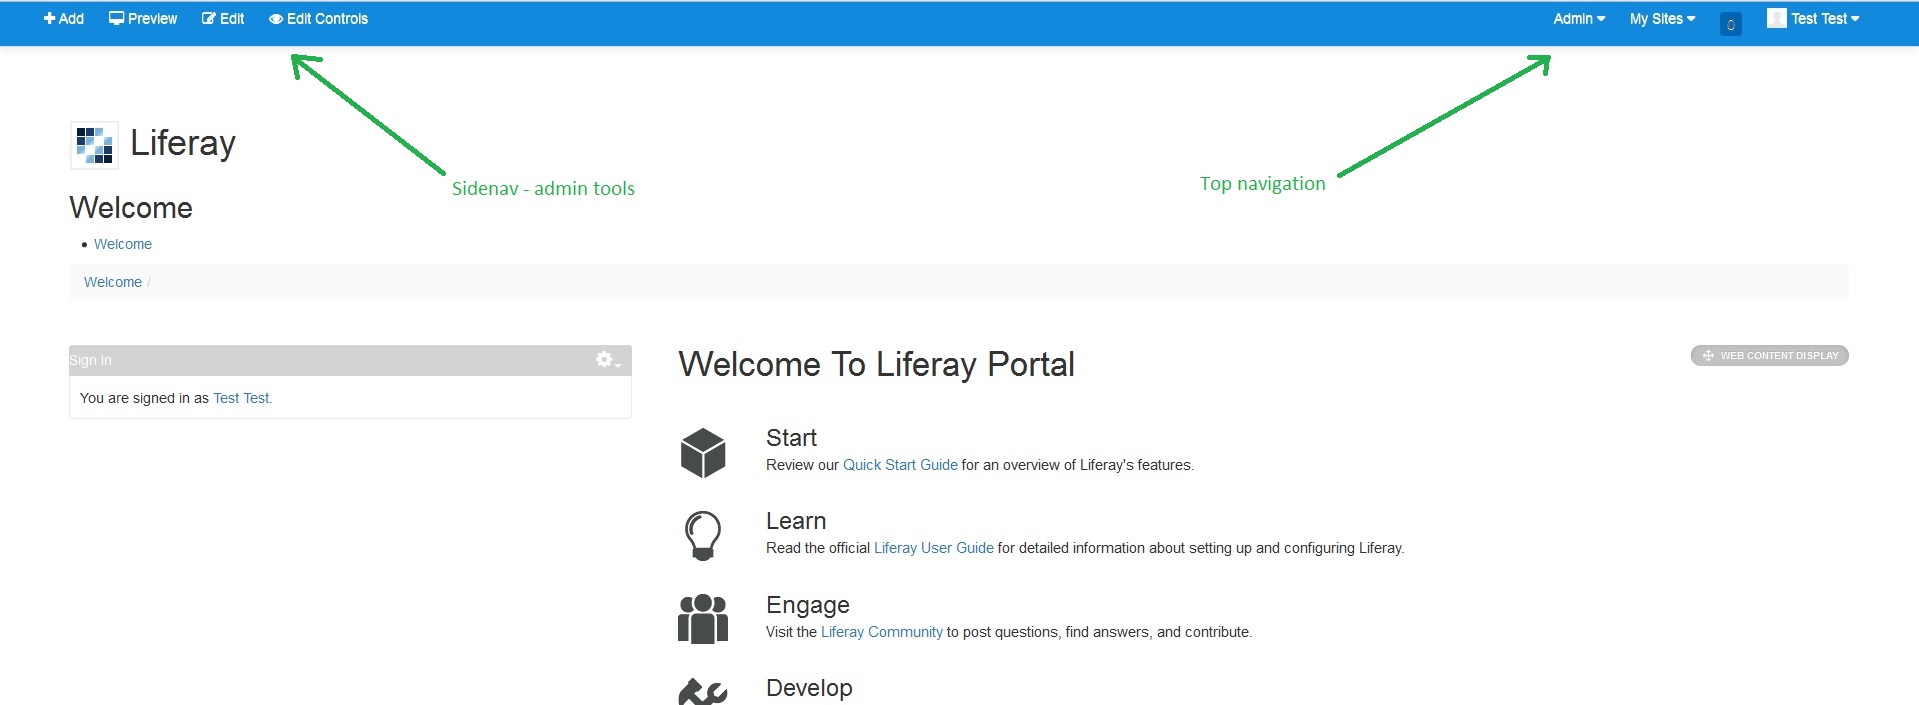
(OMG! It’s back!)
I am well aware that this solution may not be 100% best practice. But after conducting a bit of research on the matter and doing some tests of my own, I believe it to be a solid one.
Good luck!